
Here are 8 of the most important technology pieces you’ll need to get your podcast up and running in no time flat.
Podcasts are booming. According to Apple, there were more than 550,000 active podcasts on the iTunes platform as of Feb. 2018, and Podcasts Insights has now placed that number at about 660,000 — growing 20% over the past year.
More and more people are starting podcasts and sharing their hobbies, passions, business interests, and more, with others online. Podcast listenership continues to grow too, with 26% of the overall U.S. population now listening to podcasts on a monthly basis, (that’s more than 73 million Americans). And many experts are testifying how regular podcasts can produce positive effects on your content, business, or brand.
So how hard is it to join this community of podcast creators? Not hard at all!
Once you’ve come up with your podcast topic and sketched out a few show outlines, you only need a handful of basic components to get started.
Here are the eight main technology pieces to consider when starting a podcast:
1. Microphone
With plenty of low-cost microphones out there that will significantly improve your sound quality, it makes sense to invest in something that will sound noticeably better than a smartphone microphone or cheap gaming headset mic that so many first-time podcasters start out with. It will be worth your while to research and invest in what’s right for you.
There are two main options to consider when choosing a podcasting microphone. Here’s the first:
USB or XLR?
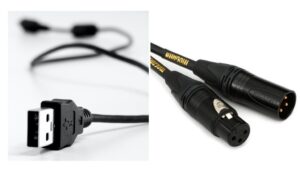
USB microphones will plug right into your computer, and XLR microphones require an audio interface to connect. XLR microphones tend to produce higher-quality sound, but there are many USB microphones that sound great as well and will get the job done for minimal cost. It all depends on your preference and set up.
An XLR microphone is a more universal solution, though. Your setup will be able to expand and grow with more microphones and headphones, and you will be able to bring your own mic to use with other setups (if you’re a guest on another podcast for example).
The second factor to consider when choosing a microphone is:
Dynamic or Condenser?
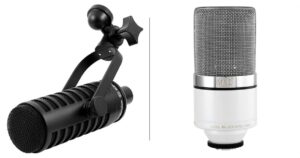
Dynamic microphones do not require 48V phantom power and feature a more narrow pick-up pattern, which can actually work great for noisier room environments. Dynamics deliver a classic “live” sound, while condenser mics require 48V phantom power and are more sensitive. Condensers can pick out more detail in a podcaster’s voice, but in an untraditional setup with bad sound treatment, condenser mics may sometimes pick up unwanted noises and reflections from the room.
2. Audio Interface
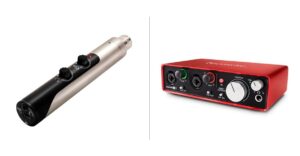
If you decide to go with a USB microphone, then you won’t need an audio interface (at least not right away). But if you go with an XLR microphone, either dynamic or condenser, then you’re going to need an audio interface to convert the mic signal from analog to digital, which your computer can record.
There are numerous audio interfaces out there – some with single connections, some dual-channels and a many more high end interfaces with multiple channels and advanced preamps inside to improve your sound.
For podcasters just starting out, audio interfaces with just one or two connections should suffice. Having an interface with one connection makes for quick and easy setup while having two connections opens you up to having guests and doing interview-style podcasts in the same room.
Also, be sure to look at how many headphone outputs an interface has. If you have two people on your podcast, you’ll want an audio interface that can output two sets of headphones.
3. Mic Stand
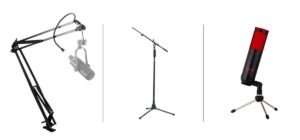
Once you’ve selected your mic and your audio interface, now you need a mic stand. The most suitable stands for podcasting are the table-mounted “scissor arm” style stands, where you can easily move the microphone to exactly where you want it and leave it in place. Other options are tabletop stands, which can get the job done but might pick up keyboard typing sounds or other noise around the table, and traditional boom style mic stands, which work but take up more floor space.
4. Pop Filters/Windscreens
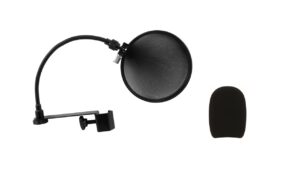
Pop filters are light mesh screens placed three to six inches away from condenser microphones to eliminate the undesirable, plosive “p” pops. They come in a variety of sizes and materials and can make a huge difference in improving podcast sound quality.
Windscreens are typically for dynamic microphones and are usually soft foam coverings that fit over the end of the mic. These help dampen any wind noise and also help eliminate the plosive “p” sounds that can ruin podcast audio (or any vocal take for that matter).
5. Shockmount
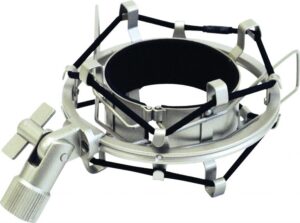
Shockmounts are most important for condenser microphones. The heightened sensitivity of condenser microphones means that slight shakes or vibrations of the mic stand can be picked up by the microphone and create noise and low frequency rumbles.
Shockmounts isolate the microphone from the stand and provide dampening effects so the microphone doesn’t move and only picks up the sound coming from your voice. Dynamic mics typically do not require shockmounts.
6. Headphones

Headphones are important because you want to be able to really hear not just your own voice, but the voice of your guests as well. The headphones don’t have to be expensive, but having closed-back headphones that fit all the way over your ears can help you keep focused on the podcast material itself and not be distracted by any outside noise. Smaller ear buds are not ideal for podcasting.
7. Audio Recording Software
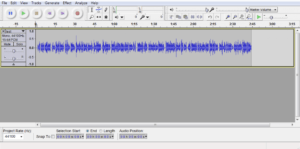
There are a number of different programs out there that can record audio and allow for editing. Audacity is the most popular because it is free and available on both Mac and PC. Garageband is another free software for Mac users that will record audio. And there are plenty of Digital Audio Workstations (DAWs) like ProTools, Logic, Cubase, and many more, that will give you plenty of editing options so you can fine-tune your sound and edit out any unwanted coughs, gaps, or swear words.
If you’re featuring guests from other locations, you’ll need to record the Skype or Google Hangout conversations using a separate recording software for the guest. (Skype now allows you to record audio and video calls from its own dashboard, but depending on which software you use you might have to use a third party software to record the call.)
Once you have the audio recording file of the guest, import it into your DAW to edit alongside your own voice, and then export the final version for uploading.
8. Podcasting Hosting Service
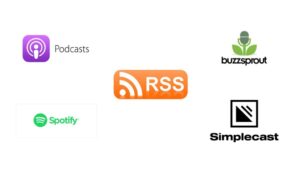
Podcast hosting services allow you to upload your podcast files and then publish them on podcast streaming networks. Buzzsprout has recently become very popular for podcast hosting. Simplecast is another host service growing in popularity, with a number of feature benefits and analytics for new and established podcasts alike. You can even host your podcast on your own website. The main thing you need is an RSS feed from the host, so that you can submit this RSS feed and appear on popular podcast streaming services like Apple Podcast and Spotify. Once you submit your RSS feed to iTunes, Apple Podcast will automatically update your podcasts whenever you upload a new episode.
Want to learn more about microphones? Check out some of our other blogs and resources:
Audio Podcasting Studio (APS) Bundle